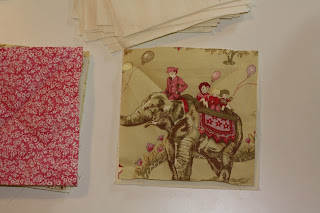
I found this tutorial for a rag quilt that promised to be simple and I set to work. My goal was to make a quilt that was about 36" by 48", here is what I used:
2 yards of cream flannel = 48 7"x7" squares
2 yards of cotton toile = 24 7"x7" squares (I centered the scenes so this required extra fabric)
3/4 yard of pink calico = 12 7"x7" squares
3/4 yard of cream calico = 12 7"x7" squares
One bag of low loft polyester quilters batting, crib size, cut into 48 6"x6" square
Be sure to prewash your fabrics.
Note: The squares are 7"x7" to start but will be 6"x6" when complete due to the 1/2" seam allowance.
This yielded 48 cotton squares for the front, 48 flannel squares for the back and 48 batting squares.
I then made these parts into 48 quilt sandwiches. Flannel square on the bottom, batting in the middle then cotton square on the top. I then stitched an 6" X shape from corner to corner using the batting as my guide.
Before I knew it I had 6 stacks of 8 "quilt sandwiches"
I laid the "sandwiches" out on the ground to preview the pattern. It is 6 squares wide by 8 squares long. To piece the squares together you put wrong sides together and sew with a 1/2" seam allowance. This leaves a rag edge between the squares. I stitched six squares together to make strips. The pattern was simply; toile, pink calico, toile, cream calico, repeat. I then stitched the 8 strips together into the blanket. Next I sewed 1/2" inch from the edge all the way around the outer edge of the quilt. Finally, I clipped the rag edges between the squares and around the edge. Here is a close up:
I then washed the quilt to get the edges to fray nicely. This was so much fun that I have already started another one. A queen size one this time!!
Here is a pic of the back of the quilt. I included the baby because the back is a little bland.


No comments:
Post a Comment